激光三维扫描
本文将深入探讨一项热门的三维扫描技术——激光三维扫描。通过阅读本文,您将了解激光扫描仪的类型、工作原理、合适的应用场景以及扫描仪的具体用途。
In a world full of ways to bring physical items into the digital realm – whether via using 3D scanners, cameras and photogrammetry software, or even smartphones with built-in LiDAR sensors – navigating the ocean of options available to you can be overwhelming. This article dissects laser 3D scanning, one of the most widely used scanning technologies.
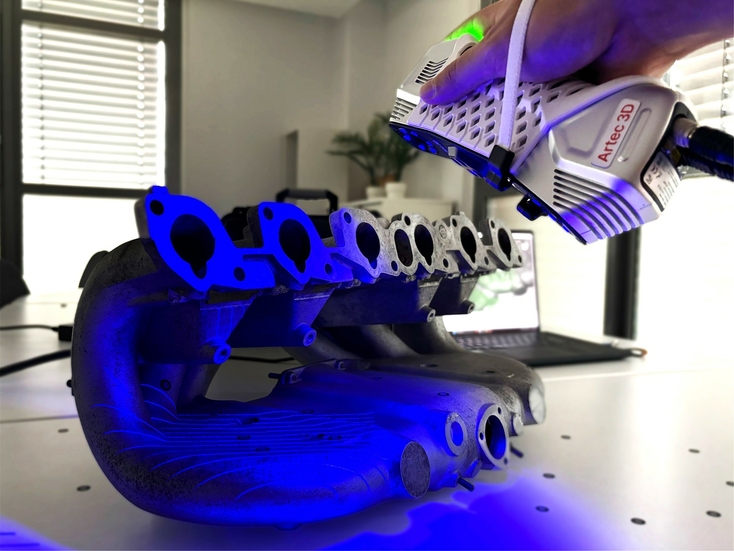
What is laser 3D scanning?
Simply put, laser 3D scanning is a process of capturing precise 3D information off any object or environment using a laser as a light source. The technology relies on laser beams to measure the distance to a surface and create ultra-realistic 3D models of objects, sites, and vast landscapes. 3D laser scanning is a popular engineering, construction, and architectural tool, commonly used to document and assess the condition of different structures.
3D laser scanners use LiDAR (light detection and ranging) by projecting laser light onto an object to record and measure precise locations and distances. Producing a point cloud file, scanners provide digital data invaluable in countless applications, from reverse engineering and quality inspection to heritage preservation and forensics. What makes the technology even more popular is that modern laser scanners are portable, safe, easy to use, and accurate down to millimeters.
How does laser 3D scanning work?
The way a laser scanner works boils down to beaming out light pulses at high speeds, which reflect off objects and return to the scanner’s sensor (LiDAR). For each pulse, the distance between the scanner and the object is measured by calculating the elapsed time between sent and received pulses. Each data point is converted to a pixel with known x, y, and z coordinates.

The workflow of a LiDAR scanner could be broken down into the following steps:
Laser emission: The scanner projects laser beams onto an object, typically in the form of rapid, short pulses in the infrared spectrum, which is invisible to the human eye.
Pulse reflection: When laser pulses hit the object, they bounce back towards the scanner. The surface characteristics of the object, such as its color, texture, and reflectivity, affect how the laser beam returns to the scanner.
Time-of-flight measurement: The scanner measures the time it takes for each pulse to travel from the device to the object and back. This time is then converted into metric measurements using the speed of light.
Point cloud creation: By calculating distances to multiple points on the object’s surface, the scanner creates a dense set of data points known as a point cloud. Each point represents a 3D location in space.
Data processing: The point cloud is processed into a detailed 3D model or map, which replicates the scanned environment. This data can be edited, analyzed, and used to create watertight 3D models.
Key point
Laser 3D scanning works by projecting laser light onto an object and measuring reflected light to determine the object’s shape and dimensions. Collected data forms a detailed point cloud, which is then processed into 3D models for analysis and further use in various applications.
Types of laser 3D scanners
3D laser scanners come in an impressive variety, tailored to various applications. They range from standalone devices – handheld or stationary and tripod-mounted – to complex industry-grade solutions, such as mobile or airborne laser scanning systems or robotic arms. Laser scanners use three types of technologies: time of flight, phase shift, and triangulation. Let’s take a closer look at each of them.
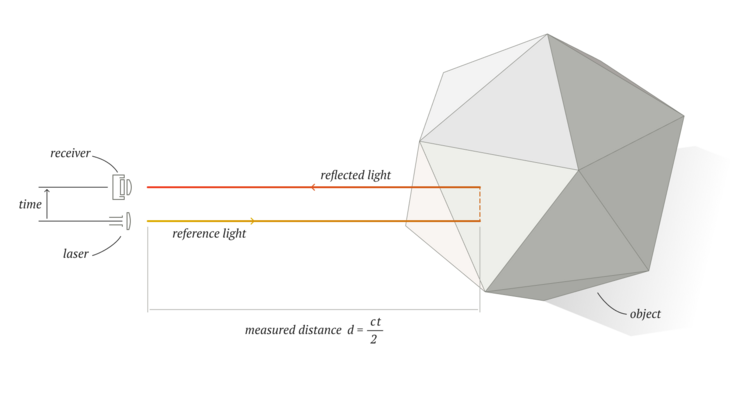
Time-of-flight systems, or pulse measurement systems, work by emitting a single pulse of laser light and determining the distance to the end point by measuring the time it takes for the light to be reflected back to the scanner’s sensor.
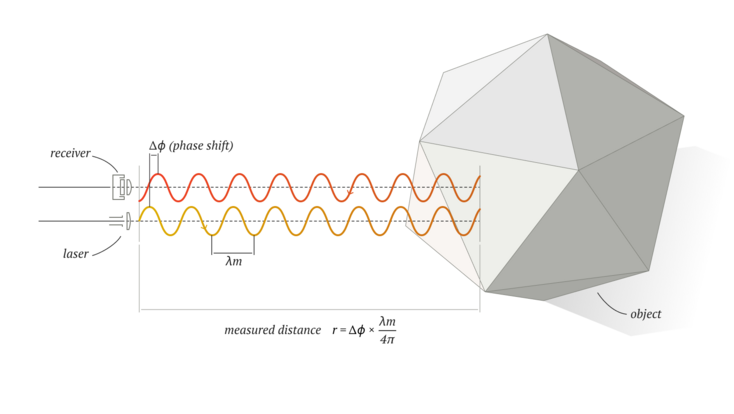
Phase-shift systems also use emitted laser light, but light intensity is modulated with specific waveforms. The reflection of intensity patterns is displaced by an impact on the surface of an object. Measuring the displacement between a sent-out laser signal and one received ensures precise distance calculation.
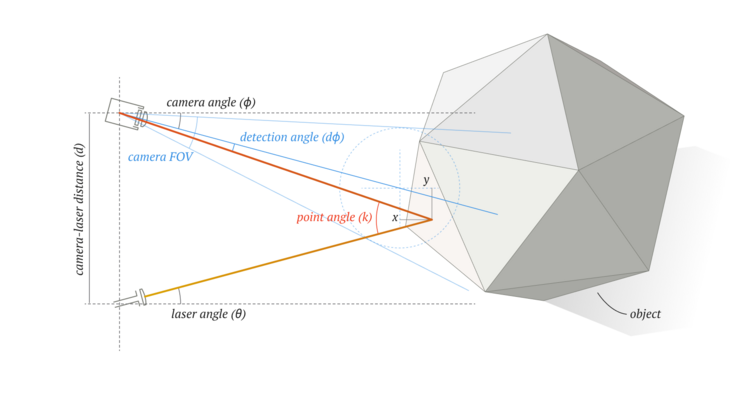
Triangulation-based laser scanners operate by emitting laser light onto an object and capturing reflected light with an onboard camera sensor. The system calculates the distance to the object using trigonometric triangulation, forming a triangle between the laser source, the sensor, and the reflected target on the object’s surface. Typically used for short-range applications (less than 5 meters), triangulation scanners excel at capturing small to medium-sized objects, ranging from 1 cm to about 2-3 meters.
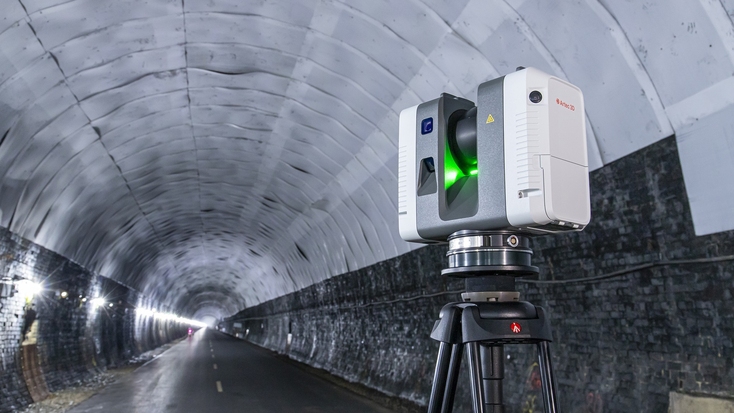
Two great examples of laser scanners designed for capturing different kinds of objects and operating at different distances are Artec Point and Artec Ray II. While the former is a metrology-grade handheld laser 3D scanner offering up to 0.02mm accuracy right in the palm of your hand, the latter is a long-range LiDAR scanner that delivers exceptional 3D point accuracy of 1.9 mm at a distance of 10 meters away.
Key point
A laser 3D scanner uses one of the three measurement technologies: time of flight, phase shift, or triangulation. Time-of-flight scanners calculate the time it takes for a laser pulse to reflect back to the scanner, while phase-shift devices measure distances by comparing modulated light wave patterns. Triangulation scanners, ideal for short-range measurements, use trigonometry to determine distances by forming a triangle between the laser source, the object, and the sensor, making them suitable for capturing small to medium-sized objects.
Artec Point is a portable 3D laser scanner, perfect for quick and accurate scanning of objects and environments. Artec’s first target-based scanner captures ultra-accurate 3D data with high repeatability, making it indispensable for industrial, engineering, and design applications. The scanner features a pinpoint accuracy of up to 0.02 mm, and a resolution of up to 0.02 mm. Its blazing scanning speed allows users to capture up to 2.8 million measurements per second, ensuring rapid and efficient data collection. Artec Point renders even complex surfaces, including those black and shiny. Users can choose between grid, parallel, and single-laser modes to maximize results, and use HD cameras fixed at a steep viewing angle to scan narrow surface areas.
Artec Ray II, in turn, is designed for large-scale, high-precision scanning, which makes it a go-to solution in manufacturing and architecture. Leveraging advanced laser technology, it provides exceptional accuracy, making it ideal for precise capture of massive objects at a distance, be it wind turbines, ship propellers, huge crafts, bridges, factory floors, forensic scenes, or archeological sites. Whether for reverse engineering, quality inspection, documenting crime scenes, or making change-over-time assessments of civil infrastructure, Artec Ray II boasts high 3D point accuracy and best-in-class angular accuracy.
Applications of laser 3D scanning
Laser scanning technology has transformed multiple industries by providing unbeatable precision, speed, and versatility when capturing detailed spatial data. It has played a crucial role in sectors ranging from construction and architecture to cultural heritage preservation and manufacturing. By capturing incredibly accurate 3D data, laser 3D scanning helps professionals across different sectors elevate workflows by minimizing design conflicts and ensuring accurate digitization for manufacturing, renovations, maintenance, and research. With its ability to generate ultra-detailed digital models, laser scanning enables smart planning, enhanced collaboration, and risk reduction, making it an essential tool in many projects.
Reverse engineering
3D laser scanning plays a pivotal role in reverse engineering by capturing the geometry of objects, which can then be replicated or modified. For example, when a company needs to reproduce a unique or discontinued part for a machine or vehicle, laser scanning allows it to generate highly accurate 3D models of the original component. These models can then be used to manufacture replacement parts with narrow tolerances, minimizing errors, eliminating the need for manual measurements, and ensuring that the final product fits into place seamlessly.
To illustrate, a Dutch builder of high-speed boats recreated the design of handmade boats for heavy-duty professional use. The team scanned three massive crafts to create precise 3D models for reverse engineering, facilitating professional boat construction and ensuring exceptional accuracy.
Quality inspection
Laser scanning is invaluable in quality control and inspection workflows. For instance, it is commonly used for inspecting bridges and floodwalls by creating high-res point clouds to assess structural integrity, alignment, and surface conditions. This data allows engineers to identify and monitor deformation over time and ensure compliance with design specifications for enhanced safety and maintenance planning.
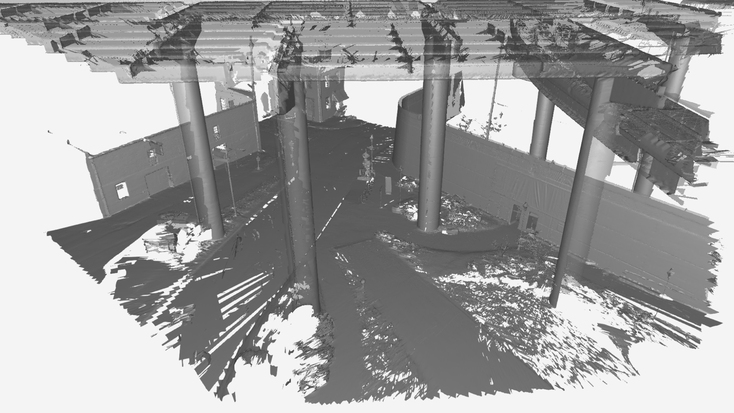
In one of their projects, GoMeasure3D found a quantifiable way of inspecting for damage a 3.28-mile floodwall under an active overpass. By accurately capturing a part of the massive structure with Artec Ray II, the engineers achieved a high level of detail, perfect for detecting deformations, measuring corrosion, and assessing maintenance needs.
Construction
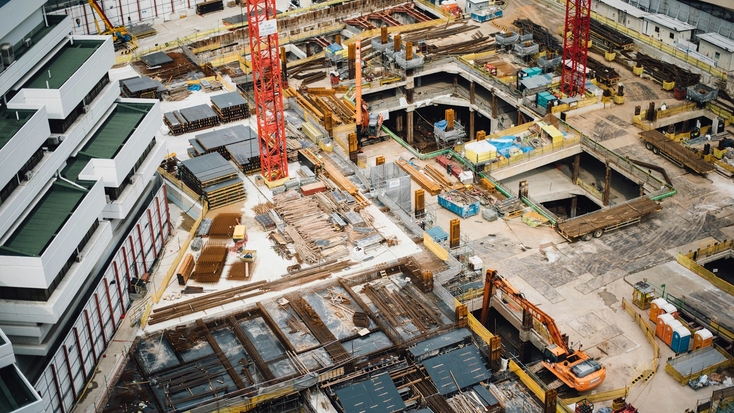
The technology is instrumental in logging the as-built state of a facility and documenting its change over time. It captures some of the most intricate details such as architectural, structural, and MEP (mechanical, electrical, plumbing) elements. For example, when renovating a facility, 3D laser scanning can provide accurate data about the current structural framework, equipment, and piping. This data enables engineers and architects to integrate new designs seamlessly, avoiding discrepancies between existing structures and suggested upgrades. The technology’s precision, with point clouds accurate down to 2-4 mm, makes it possible for renovations to meet exact specifications, identifying potential issues at an early stage and facilitating speedy project execution.
Architectural design
3D laser scanning streamlines architectural design by providing precise 3D spatial information about every element of a building. When redesigning facilities, laser scanning is used to create exact 3D representations of spaces with all their visible features, from walls and windows to HVAC systems. With this data, architects have all necessary measurements at hand. Additionally, 3D scans deliver a level of detail sufficient to verify that all parts of a facility match the design plan.
Heritage preservation
Heritage preservation professionals rely on laser 3D scanning as a non-invasive, highly accurate method to document and protect cultural landmarks. Whether preserving ancient buildings, monuments, or archaeological sites in 3D, laser scanning captures the fine details of every object, creating digital twins for restoration, conservation, and virtual reality tours. This allows us to safeguard history and culture while enabling future generations to explore and study these treasures in detail.
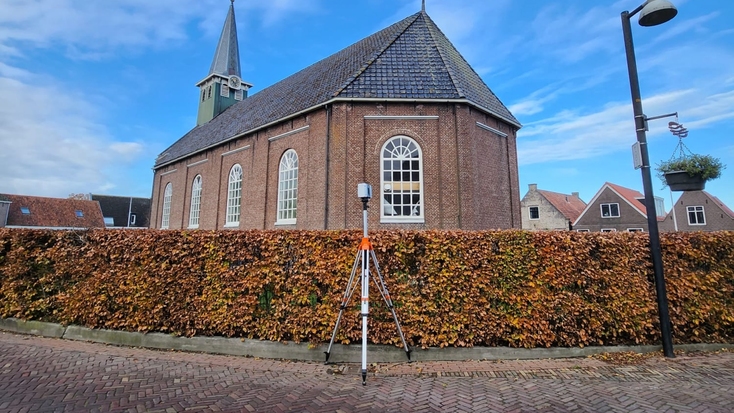
An amazing example of how it’s done is the story of Hagha Church in the Netherlands. During renovations, workers discovered tombstones beneath the church’s deteriorating wooden floor. Although the primary goal was to replace the floor to reinforce the building, the team ensured that the newly uncovered heritage remained accessible to the community. This was achieved by using a long-range 3D laser scanner to capture the entire church, including its hidden treasures.
Maintenance and retrofitting of power plants
For retrofitting power plants, where it is critical to have accurate documentation of existing infrastructure, such as boilers, turbines, and piping, laser 3D scanning is essential. For instance, when updating an aging power plant to meet new environmental standards, the technology creates a comprehensive 3D model of the plant’s infrastructure. This model then helps engineers plan and implement upgrades, ensuring that new equipment fits seamlessly within the existing layout. Furthermore, virtual walkthroughs of hazardous areas are possible, which reduces safety risks. It also becomes possible to identify components prone to wear, helping develop proactive maintenance schedules and extending the life of critical assets.
Industrial facility modifications
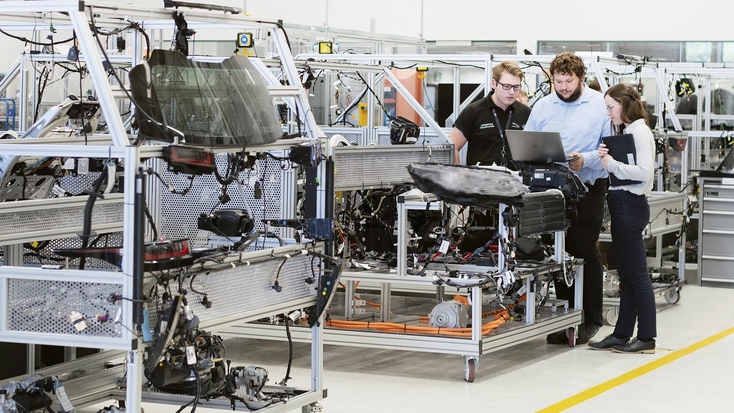
In manufacturing, detailed and accurate as-built data is necessary for modifying or expanding plants, and 3D laser scanning provides precise information about equipment, structures, and processes. For instance, when a car manufacturing plant needs to upgrade its assembly lines, laser scanning helps ensure that new machinery fits perfectly into the space available. 3D data can be used to plan installation and ensure that all components integrate smoothly, reducing the chances of costly installation errors or delays.
Forensics
In forensic investigations, 3D laser scanning is employed when specialists need to safely capture detailed crime scenes or accident sites for thorough analysis. For example, in the case of a traffic accident, laser scanning can create an accurate 3D model of the accident scene, including vehicle positions, road markings, and ambient conditions such as lighting and visibility. Such digital evidence can then be used to reconstruct events, assist in legal proceedings, and provide valuable details for accident reconstruction experts.
Another example of this application is forensic anthropology. At Mercyhurst University, a board-certified professor turned to 3D scanning to digitize hundreds of bones and transform them into anatomically precise 3D models for a groundbreaking VR course.
Key point
Laser 3D scanning is revolutionizing a host of industries by offering accurate, real-time data for specific professional tasks. From enhancing architectural design to facilitating plant retrofitting and aiding in forensic investigations, the application range of this technology is vast and growing.
Benefits of laser 3D scanning
3D laser scanning has proven to be an indispensable tool across many industries thanks to its ability to capture highly detailed and accurate 3D data. Below you can find some of the key benefits of 3D laser scanning.
High, steadfast accuracy
Laser scanning provides stunningly accurate measurements, making it effective for applications where metrology-grade data is critical, such as reverse engineering, quality inspection, construction, and manufacturing.
Rapid data capture
Laser scanners rapidly collect vast amounts of data while maintaining steady tracking. Compared to manual measurement, 3D scanning large surface areas from a distance is both faster and safer for staff on-site.
Cost-effectiveness
By quickly capturing data in a single scan, laser 3D scanning eliminates costly revamps and delays caused by measurement errors. The technology integrates seamlessly into CAD and BIM software, saving resources and helping project budgets stay on track.
Flexibility and versatility
Laser scanning technology is highly adaptable and capable of capturing data off large, complex, or hard-to-reach objects and areas. Deployable both indoors and outdoors and even in adverse conditions, it allows professionals to address challenges of varying scales.
Improved design and documentation
Point clouds generated by 3D laser scanning form the basis for ultra-realistic 3D models, ensuring designs are developed to specification and error risks are minimized. Enhanced documentation also facilitates better collaboration between teams, enabling professionals to visualize, plan, and monitor projects more effectively.
Potential challenges of laser 3D scanning
Laser 3D scanning technology offers immense advantages across various industries, but there are several potential challenges to consider. A major hurdle is the cost as high-quality laser scanning equipment often requires a significant investment. Luckily, this challenge can be mitigated by choosing cost-effective solutions that still deliver the exceptional quality associated with high-end scanners.
Software for processing and analyzing 3D scan data, especially for complex models, needs to be chosen wisely as well. For instance, Artec Studio 19 is a smart yet intuitive 3D scanning and processing software, packed with advanced features to maximize the potential of a 3D scanner. While smaller businesses or projects with tighter budgets may find maintenance, training, and licensing fees to be a financial commitment, long-lasting benefits, such as superior 3D data quality and consistently accurate results, make the investment worthwhile.
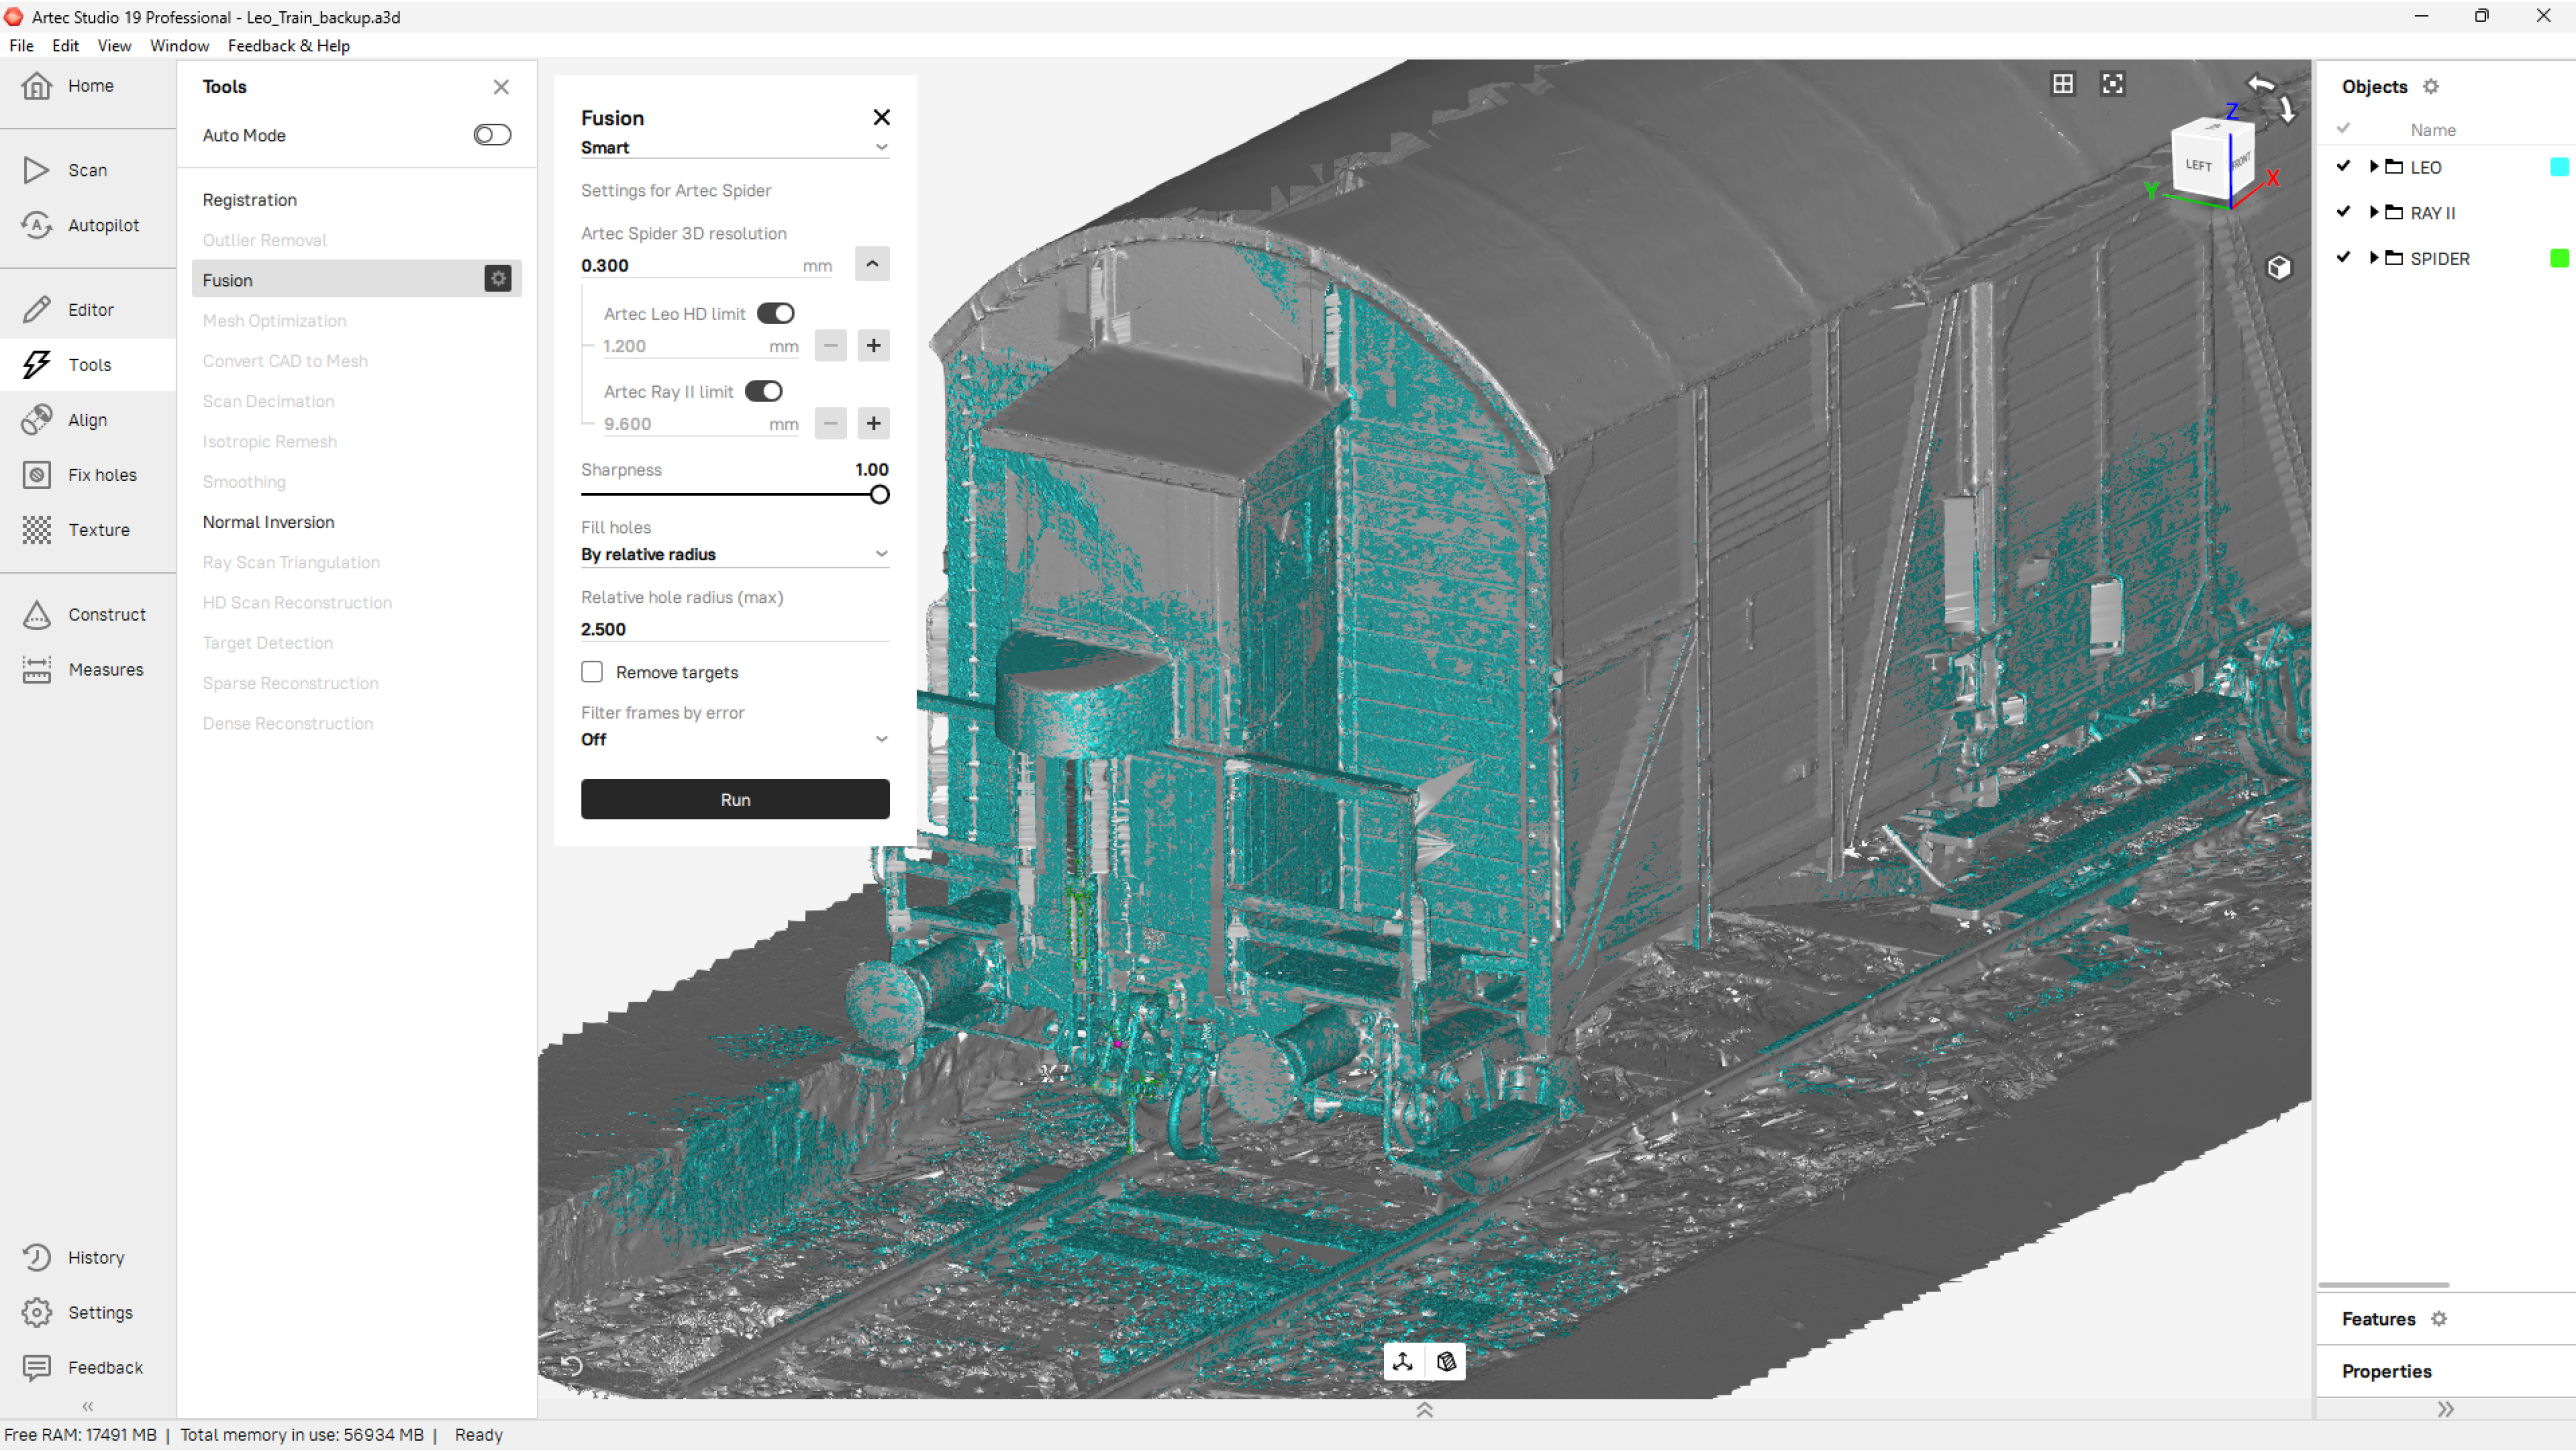
Another challenge of laser scanning lies in managing large datasets. Clouds generated by 3D scanners may consist of millions or even billions of data points. Massive files can be challenging to store, process, and manage, often requiring robust software and high-powered computing systems. Working with such detailed scans, especially those of large structures or environments, can slow down workflows and extend project timelines. Converting raw point clouds into usable outputs like CAD drawings or BIM models can be time-consuming as well. However, tools like Artec Studio 19 simplify this process: designed to handle huge datasets, the software makes applications such as 3D modeling, reverse engineering, and quality inspection much more efficient and accessible.
Ambient conditions should be taken into account as well. The accuracy of scans can often be influenced by lighting, surface reflectivity, and material properties. For instance, highly reflective surfaces like glass or mirrors or very dark surfaces can complicate data capture, resulting in inaccurate scans with gaps. This is where relying on the right scanner becomes essential, especially one capable of capturing data even in poor lighting conditions or off challenging surfaces. Artec 3D laser scanners excel in these situations, ensuring top-quality results.
Moreover, picking up Artec laser scanning does not require much training. Both the hardware and the software are user-friendly, with a relatively mild learning curve. Even beginners can become proficient in collecting accurate data and interpreting results in under two hours. Artec’s intuitive technology minimizes data error and misinterpretation risks, ensuring users with different levels of engineering expertise can fully benefit from the technology.
The future of laser 3D scanning
Looking ahead, 3D laser scanning is set to transform industries such as engineering, construction, manufacturing, and conservation. A key trend shaping the future of the technology is the integration of artificial intelligence (AI) and machine learning (ML), which automate complex tasks like processing point clouds, thus reducing manual input and increasing efficiency. AI algorithms enable real-time quality control, identifying discrepancies between design models and scanned structures, while ML can predict wear and tear in buildings. In addition, the ease of use and portability of modern 3D scanning devices make data capture more accessible in industries like mining and construction, even for smaller companies.
Further advancements in 3D laser scanning include deeper integration with AR and VR, which means professionals can interact with 3D models in immersive ways, improving design visualization and overall decision-making. The speed of data acquisition and processing is accelerating too, making 3D scanning more and more efficient for fast-paced projects. Improved scanning accuracy, driven by better sensors and software, is enabling industries like aerospace and construction to achieve tighter tolerances and reduce waste. Overall, the next few years promise to make 3D laser scanning even smarter, faster, and more versatile, taking the quality of data capture and its application range to a completely new level.
继续阅读
更多信息请访问
学习中心
选购扫描仪时最重要的是选对分辨率。此外,准确度也很重要,它决定了虚拟作品与现实中物体的差异。
三维扫描的成本多高,受到诸多因素的影响。本指南将聊一聊这些影响因素,便于您决定是入手一台扫描仪自用,还是寻求专业扫描服务。
为真正了解世上最优秀的三维扫描仪如何采集各种尺寸和难度的物体,我们必须先深入了解结构光工作原理。本文旨在深入浅出地向您阐释结构光相较于其他技术的优势,包括三坐标测量机、CGI摄影测量法。随后,我们将介绍对于结构光三维扫描仪而言,难度较大的表面可能有哪些特征。


